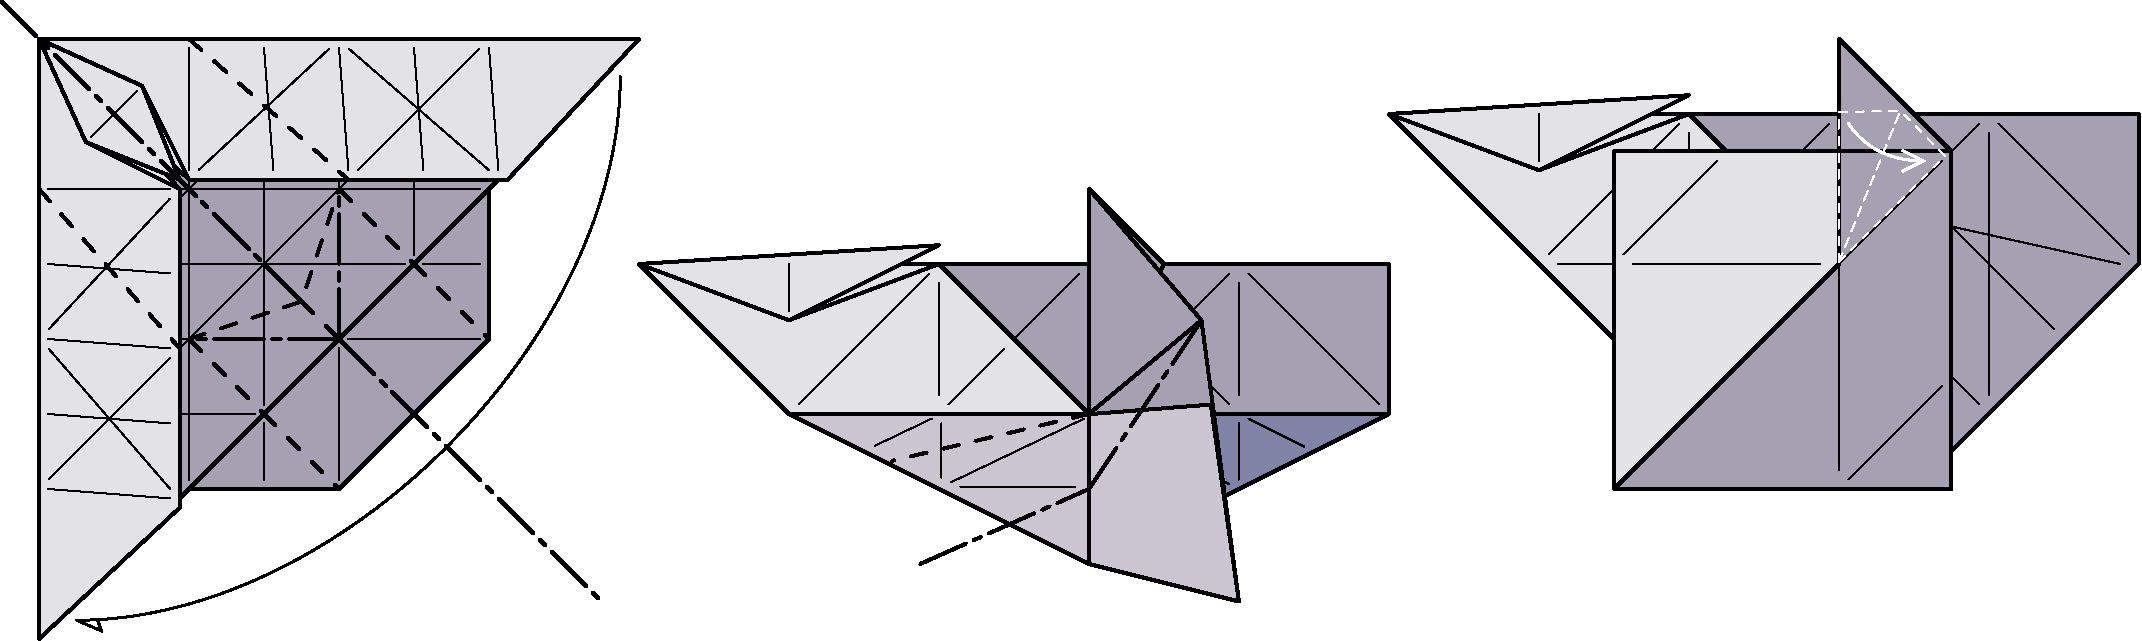
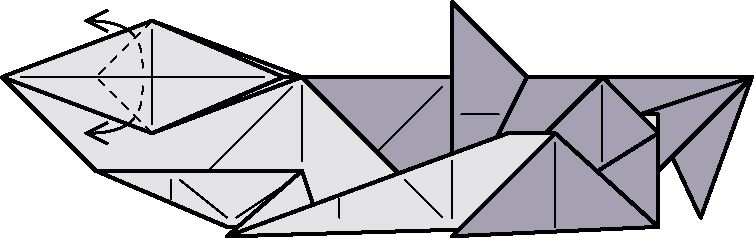
28. Precrease the new flap. Repeat behind.
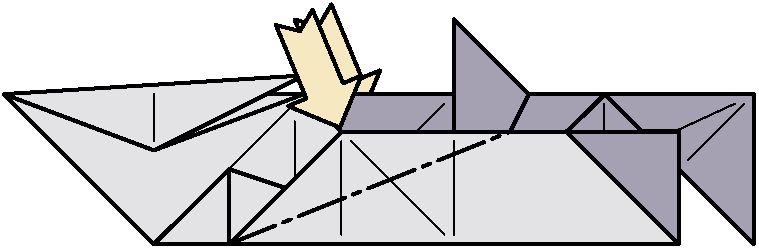
31. Fold the long flap down in half, flattening the side.
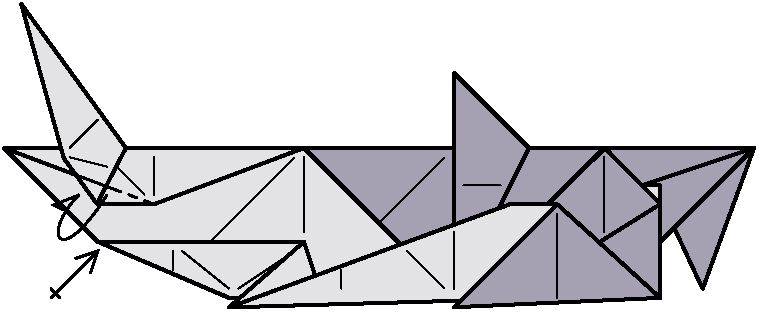
34. Pull one layer back out. Repeat behind.
Online collections
monedastodas.com
All collections » Origami » Shark
This model was commissioned by the New York Times, and appeared in the business section of the Sunday, April 11,1999, edition. It was designed on April 7-8, 1999. The tail construction borrows heavily from John Montroll’s blue shark that appears in Origami Sea Life. The body is based on my orca model.
Permission is granted for duplication of these diagrams for personal use and for teaching purposes. The model may not be used commercially (sold, displayed, photographed, or taught) without the express consent of the designer.
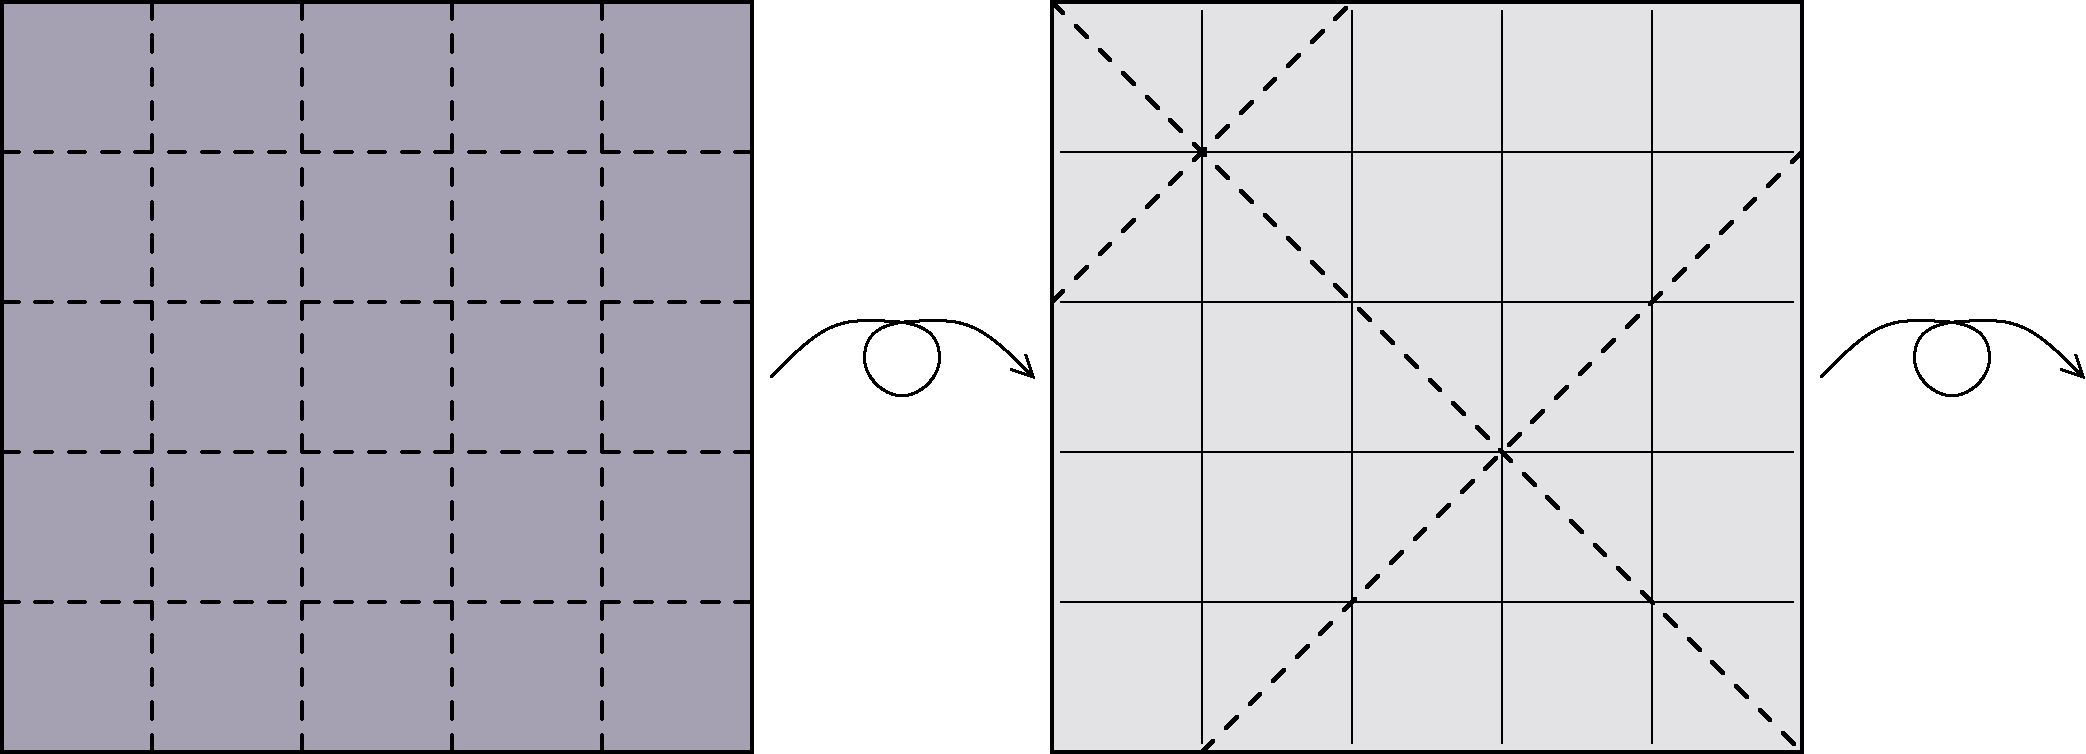
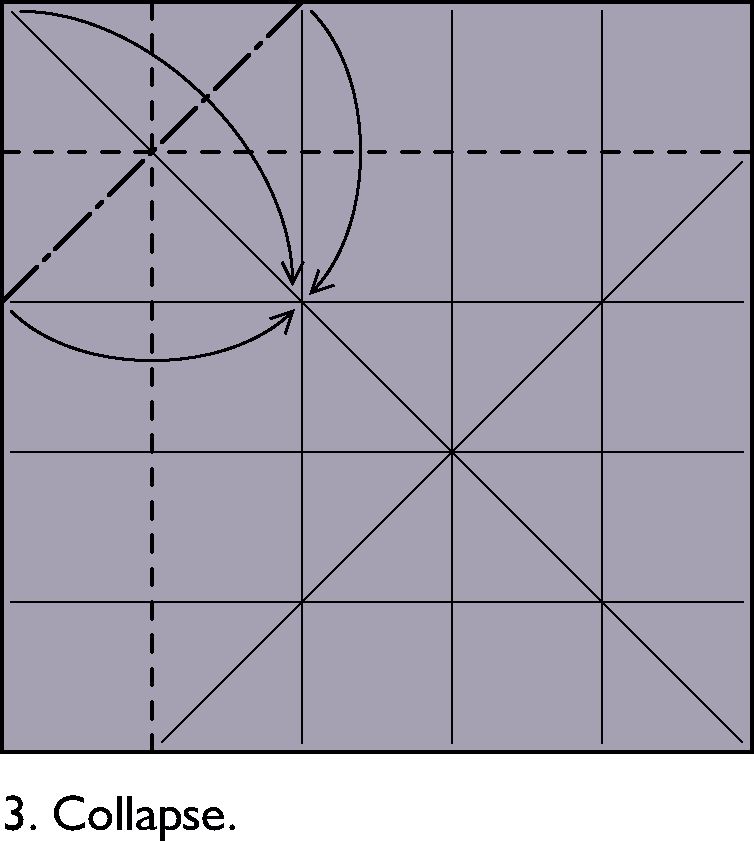
I. Precrease into fifths. 2. Precrease.

4. Mountain fold two corners under.

6. Precrease top layer only.
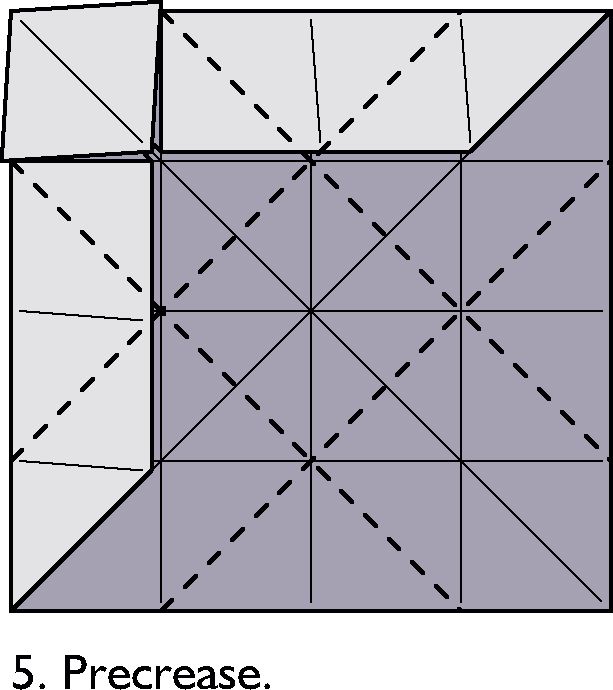
7. Precrease.
8. Precrease. (This step can be omitted.)
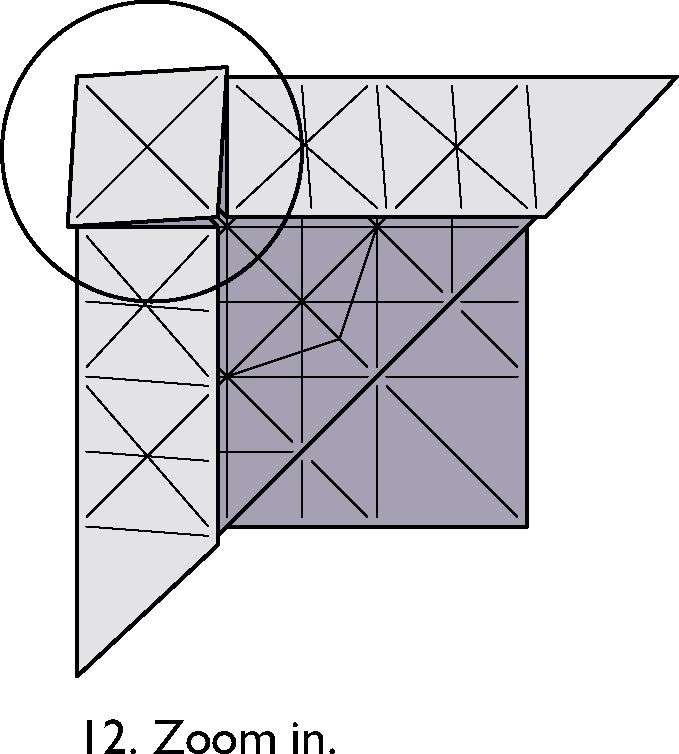
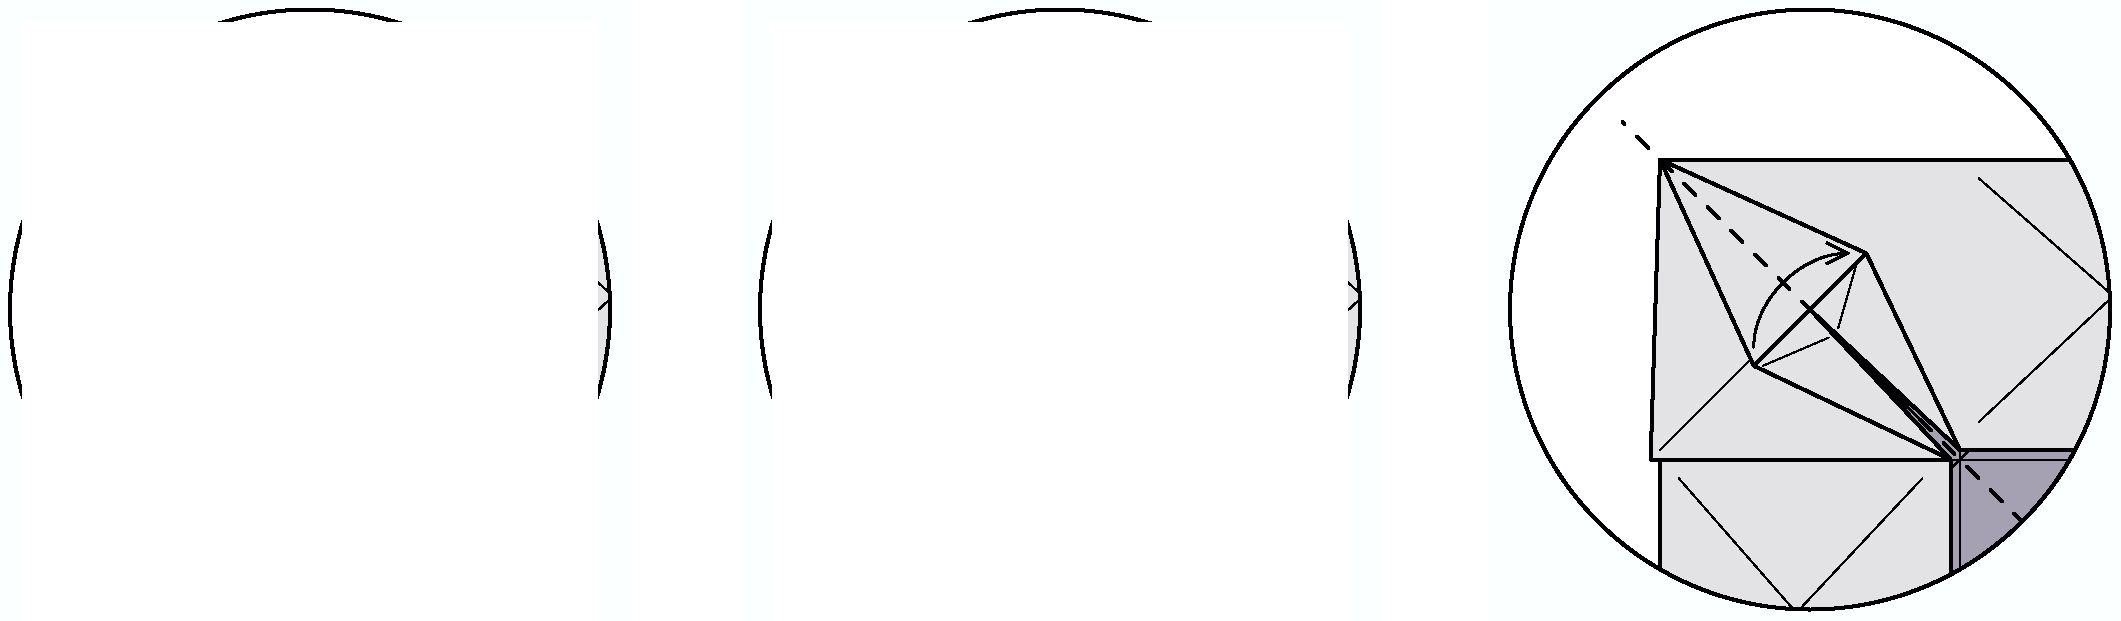
Page 2

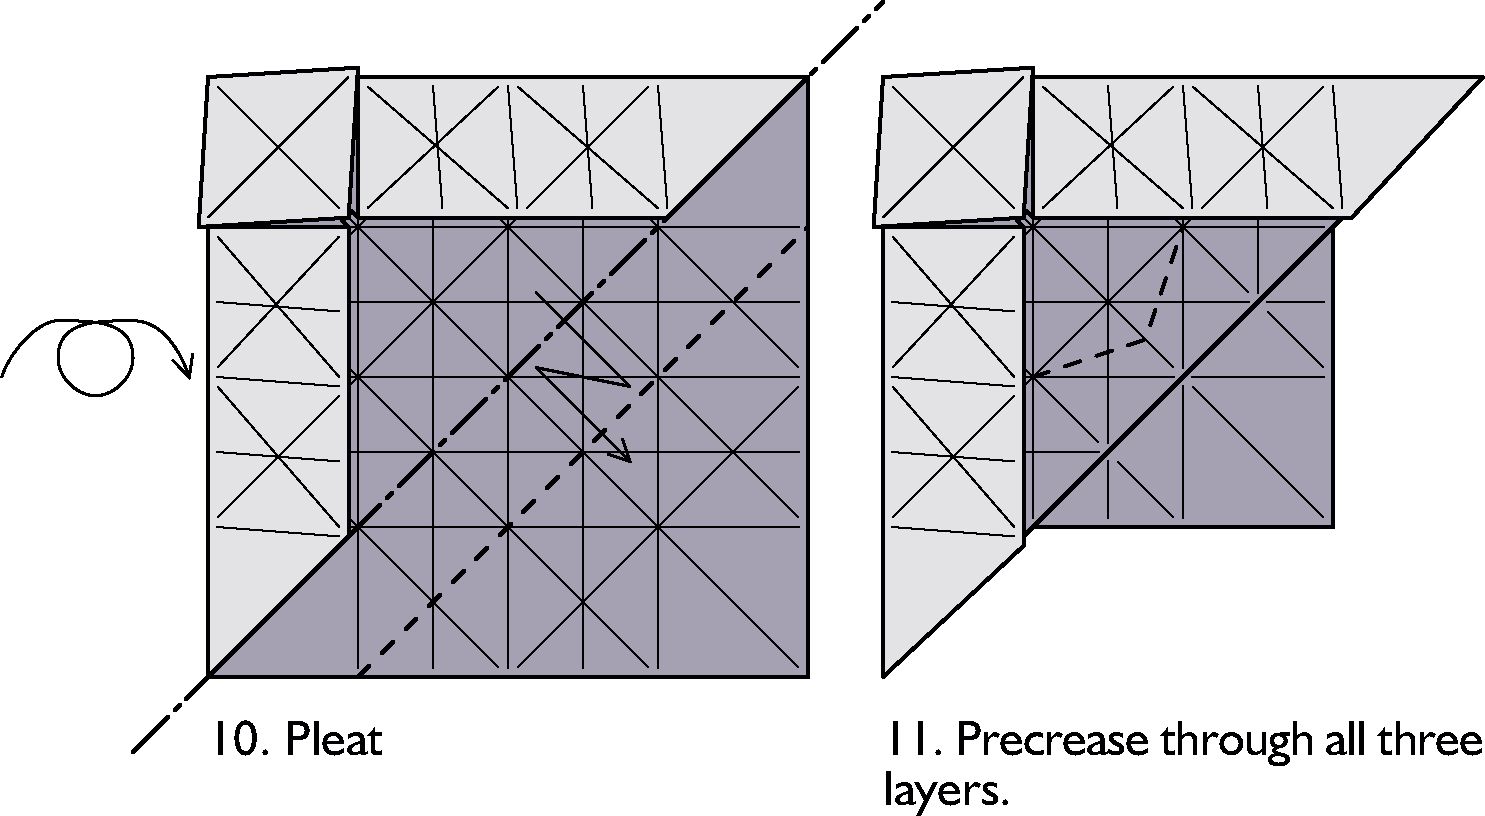
9. Grid precreasing complete.
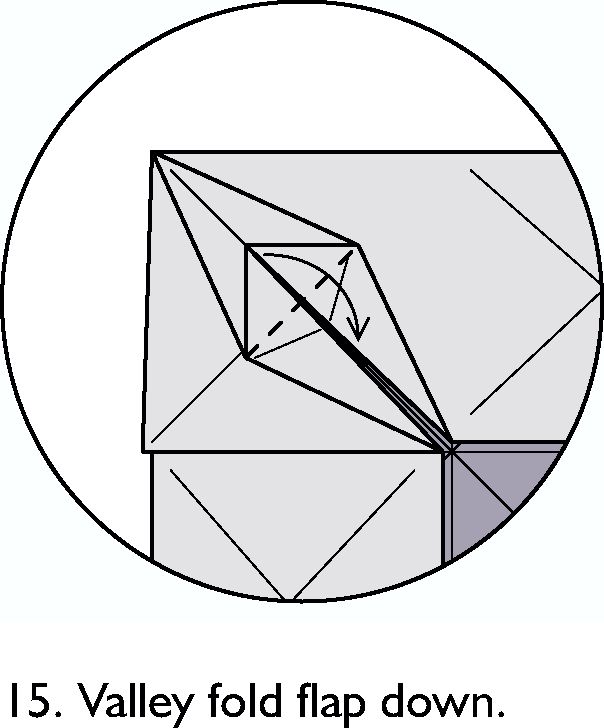
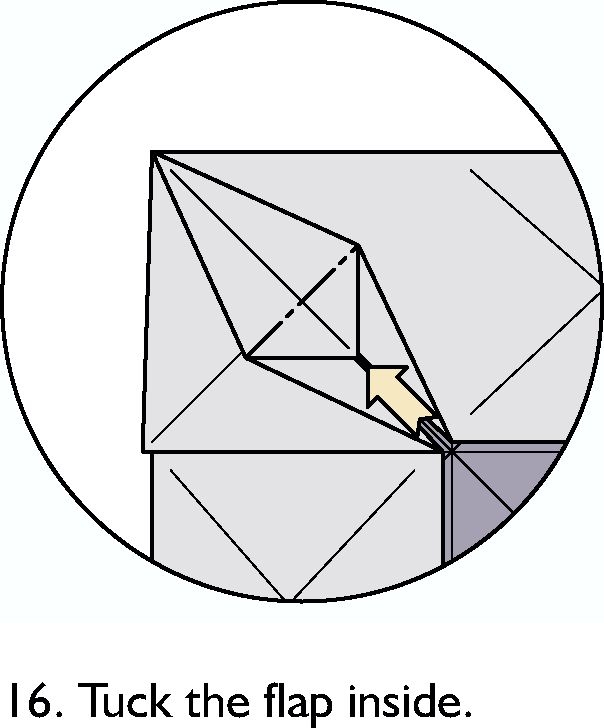
17. Fold flap back.
Page 3
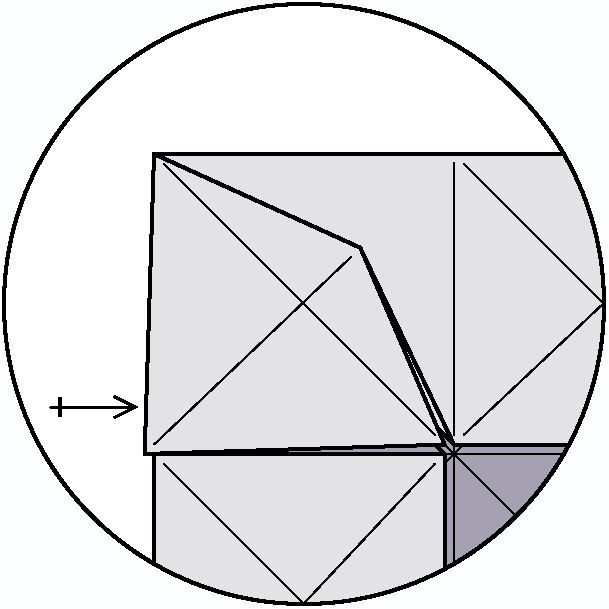
18. Repeat steps I3-I7on the other side.
20. Mountain fold the tip behind.
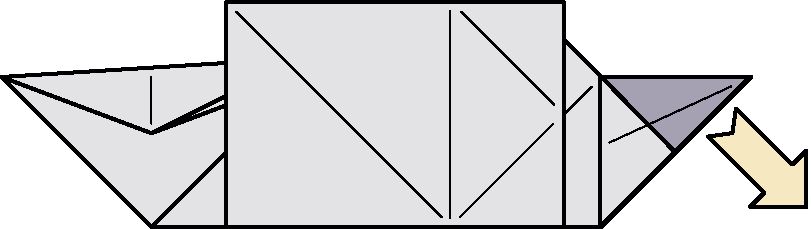
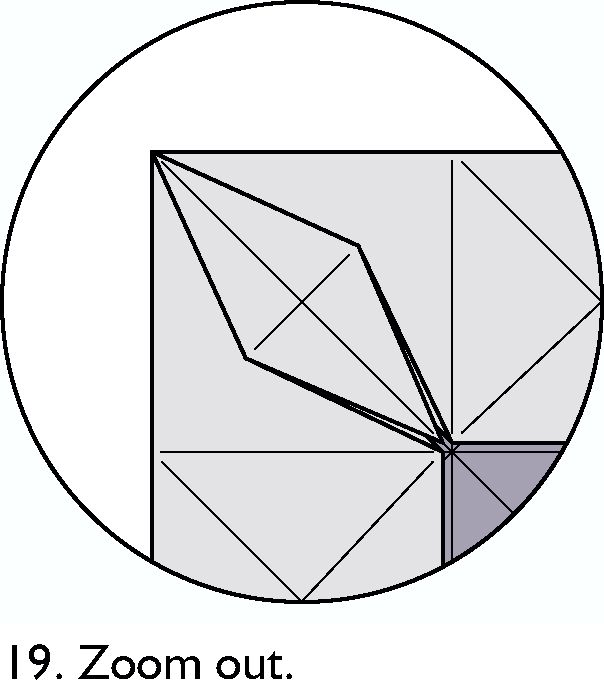
2I. Fold in half, forming the dorsal fin at the same time. The
sides will not lay flat. the body.
22. [Enlarged view.] Collapse the near and far sides against
23. Inside reverse fold the innermost layer.
25. Fold the near side up. Repeat behind.
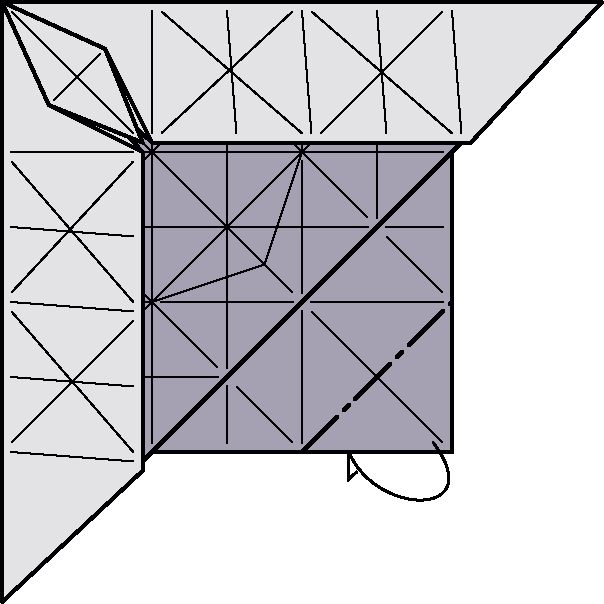
24. Wrap a layer around to the front. Repeat behind.
26. Inside reverse fold. Repeat behind.
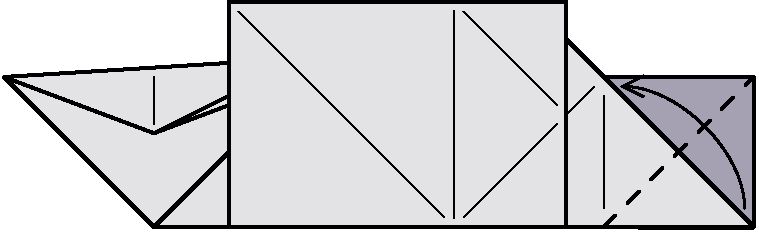
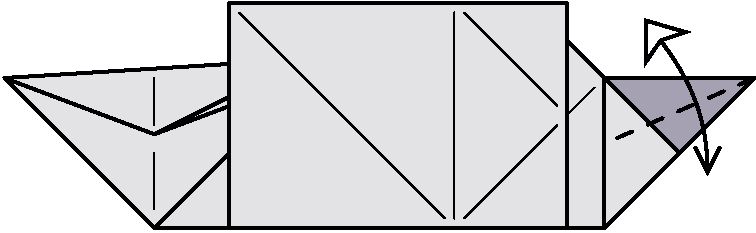
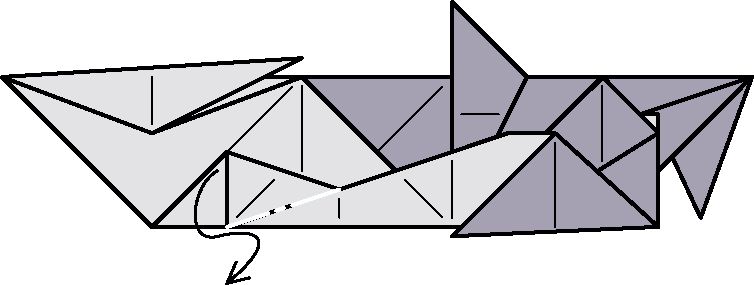
27. Fold corner up. Repeat behind.
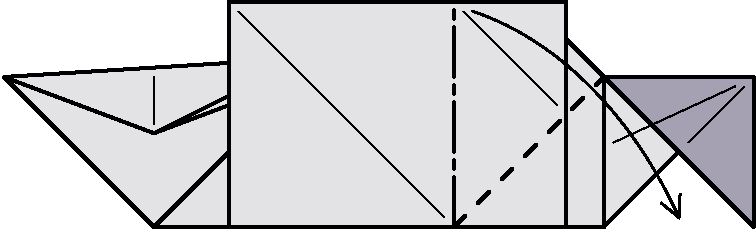
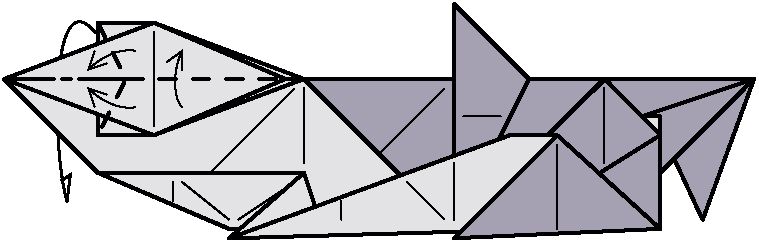
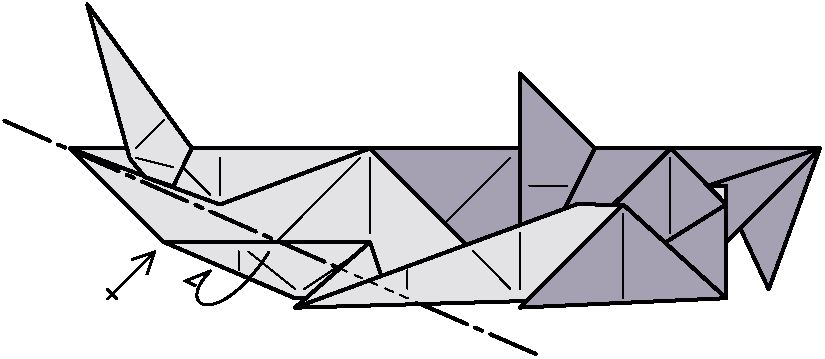
30. Fold the top layer down towards the head. The rest of the side will not lie flat.
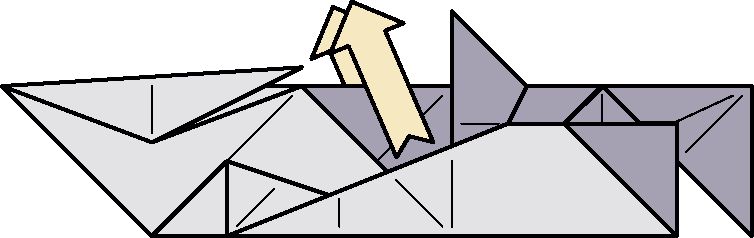
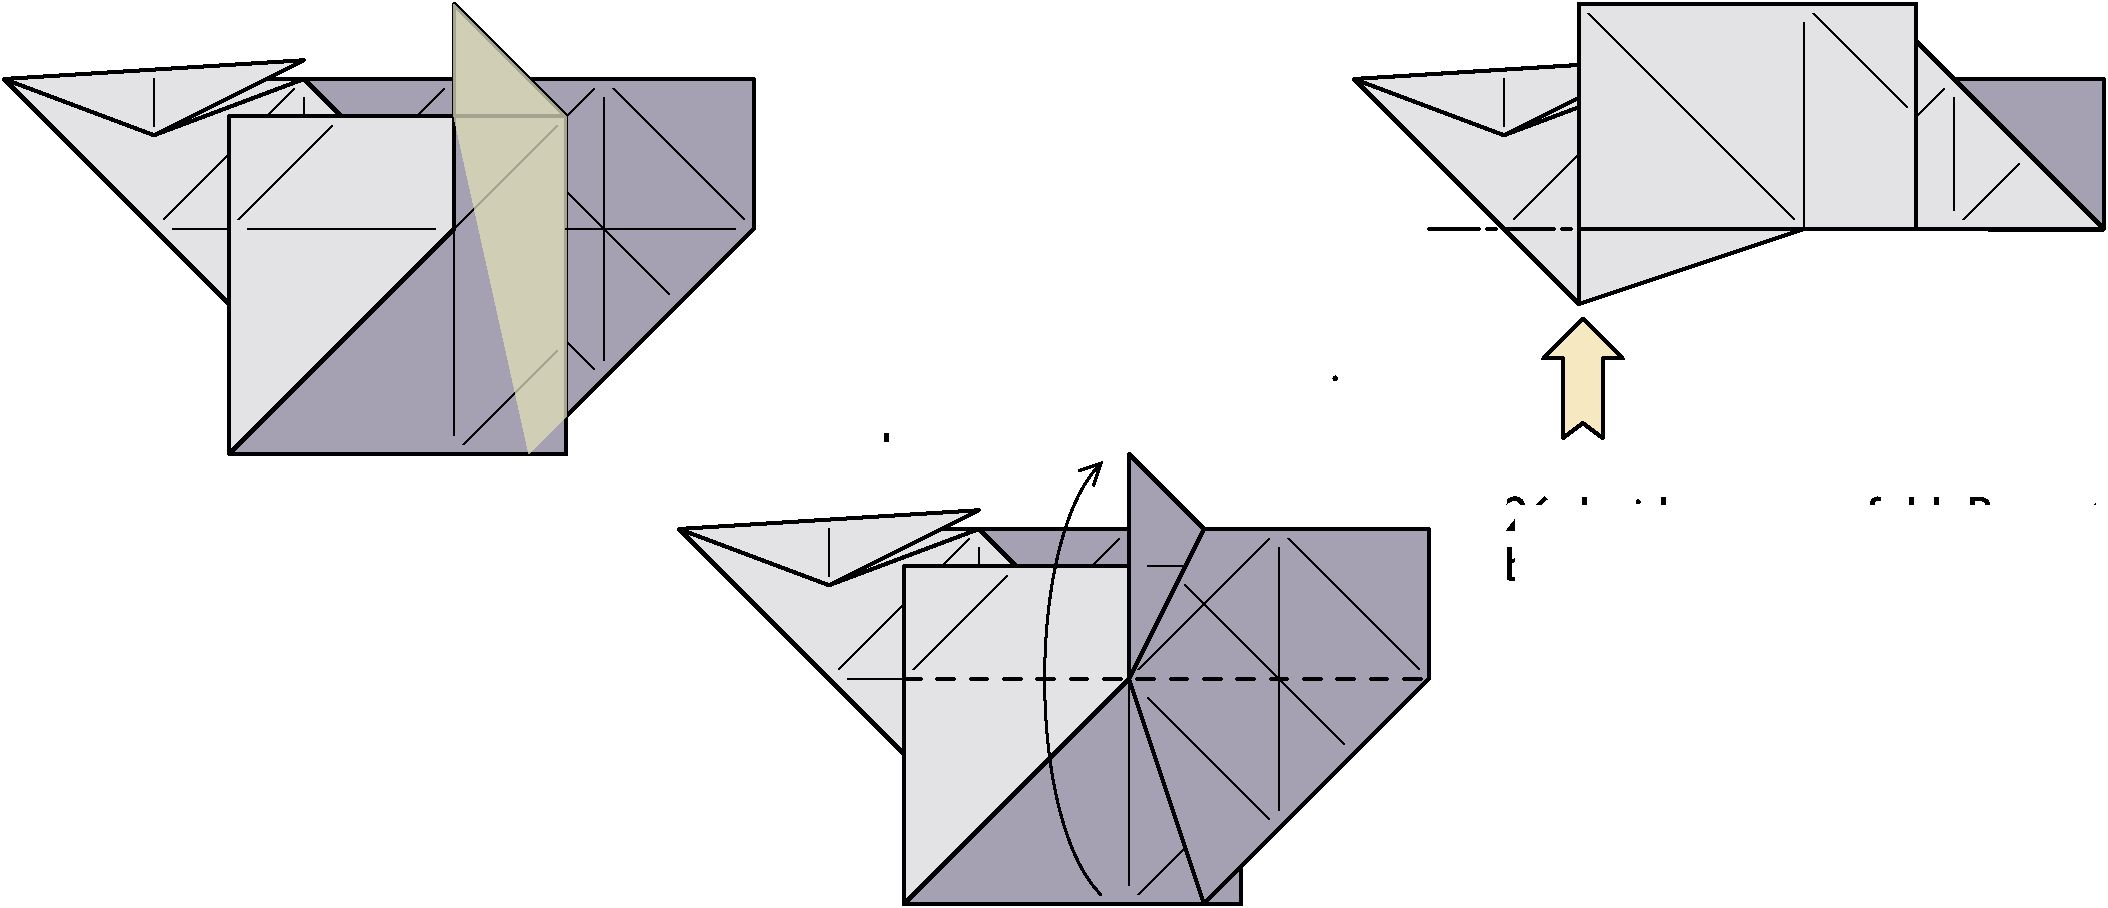
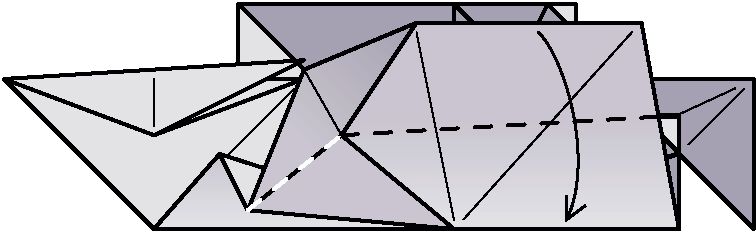
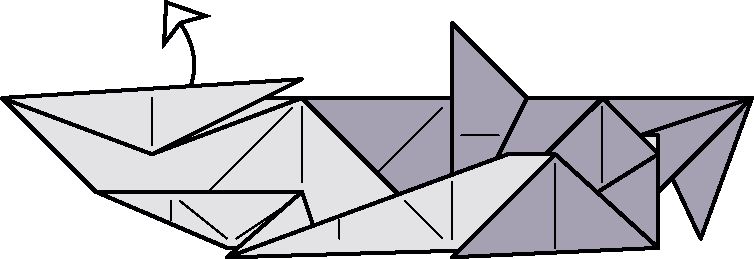
33. Open sink. Be careful since it is not possible to precrease this step. Repeat behind.
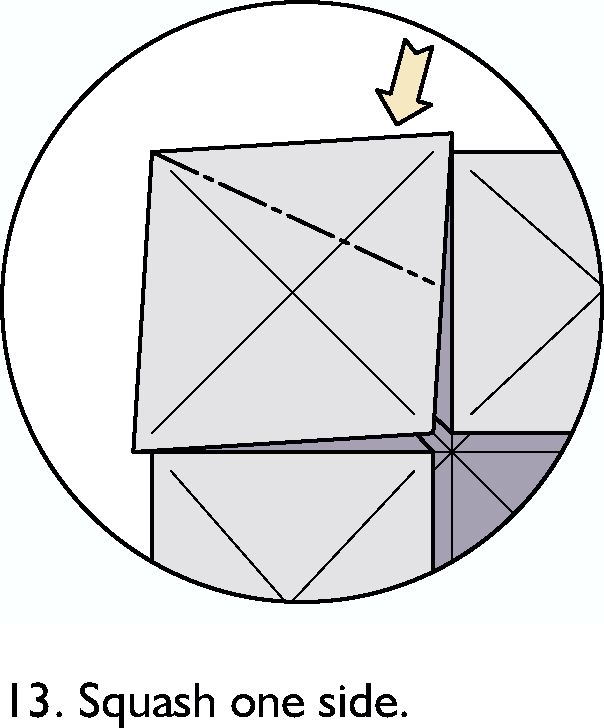
36. Squash fold. Repeat behind.
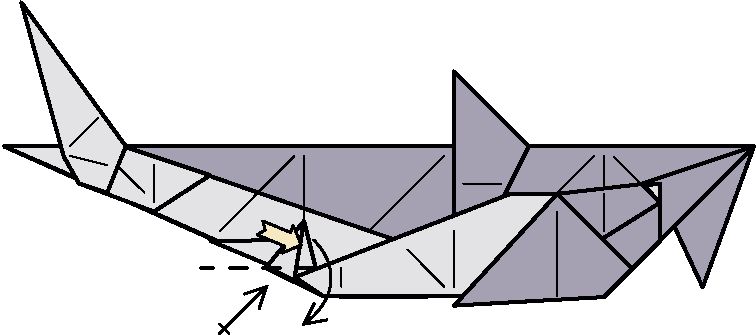
37. Crimp the nose (one layer only).
28. Precrease the new flap. Repeat behind.
31. Fold the long flap down in half, flattening the side.
34. Pull one layer back out. Repeat behind.
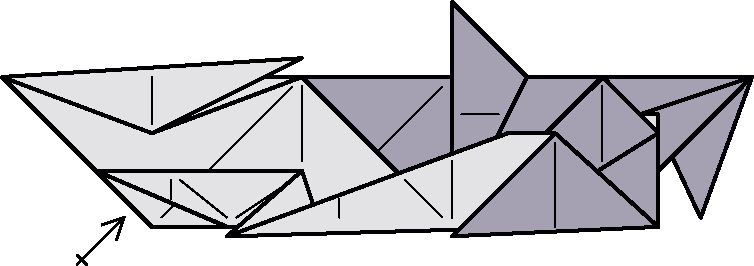
29. Pull out a single layer.
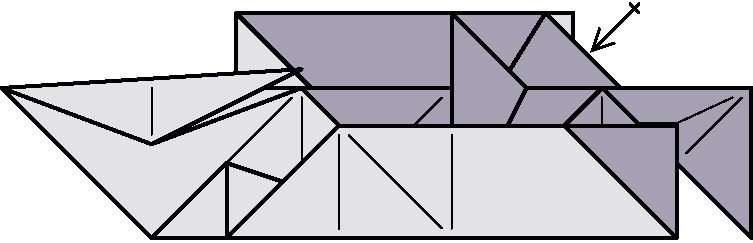
32. Repeat steps 30-31 behind.
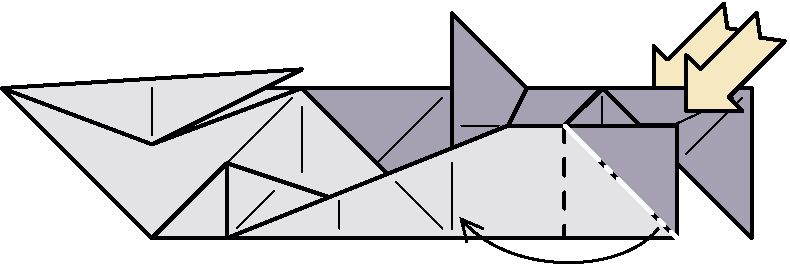
35. Closed sink. The sink must take place along the outermost layer. Repeat behind. Steps 34-35 are optional!
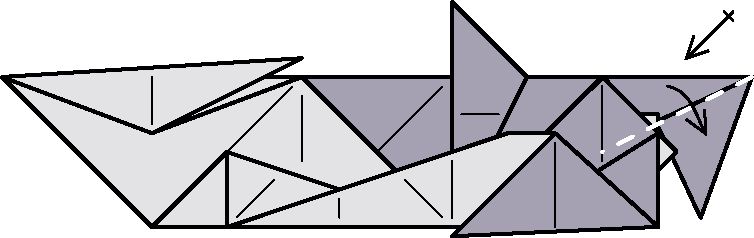
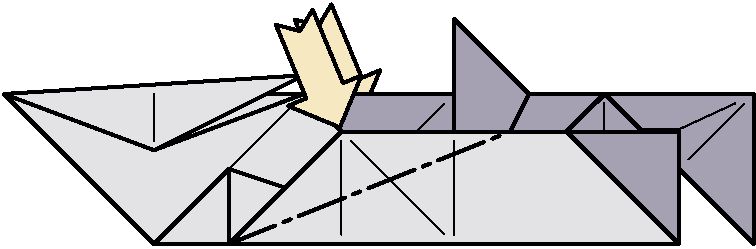
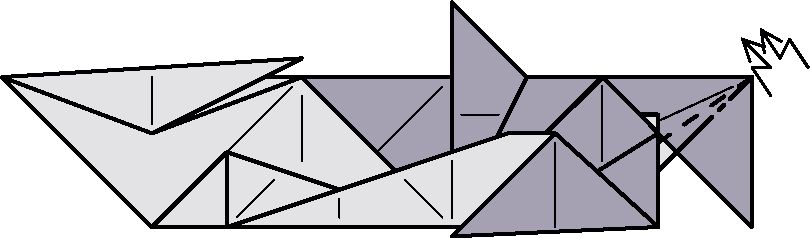
38. Fold the two sides of the head down to cover the crimp.
Great White Shark by Joseph Wu (Diagrams © 1999 by Joseph Wu)
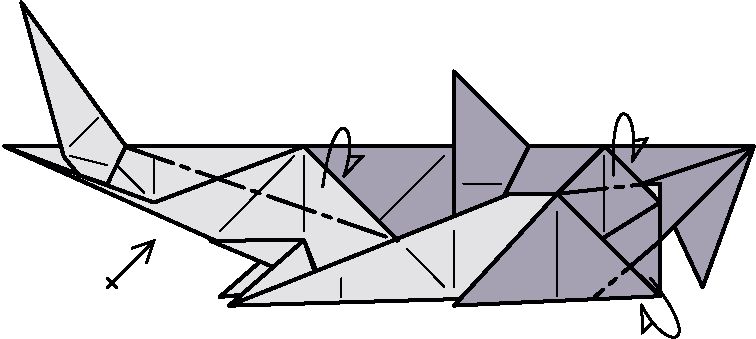
Page 4
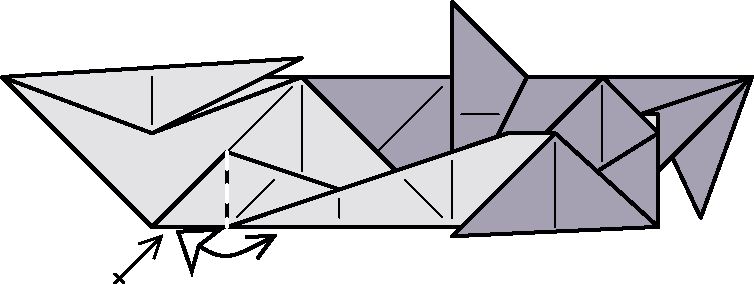
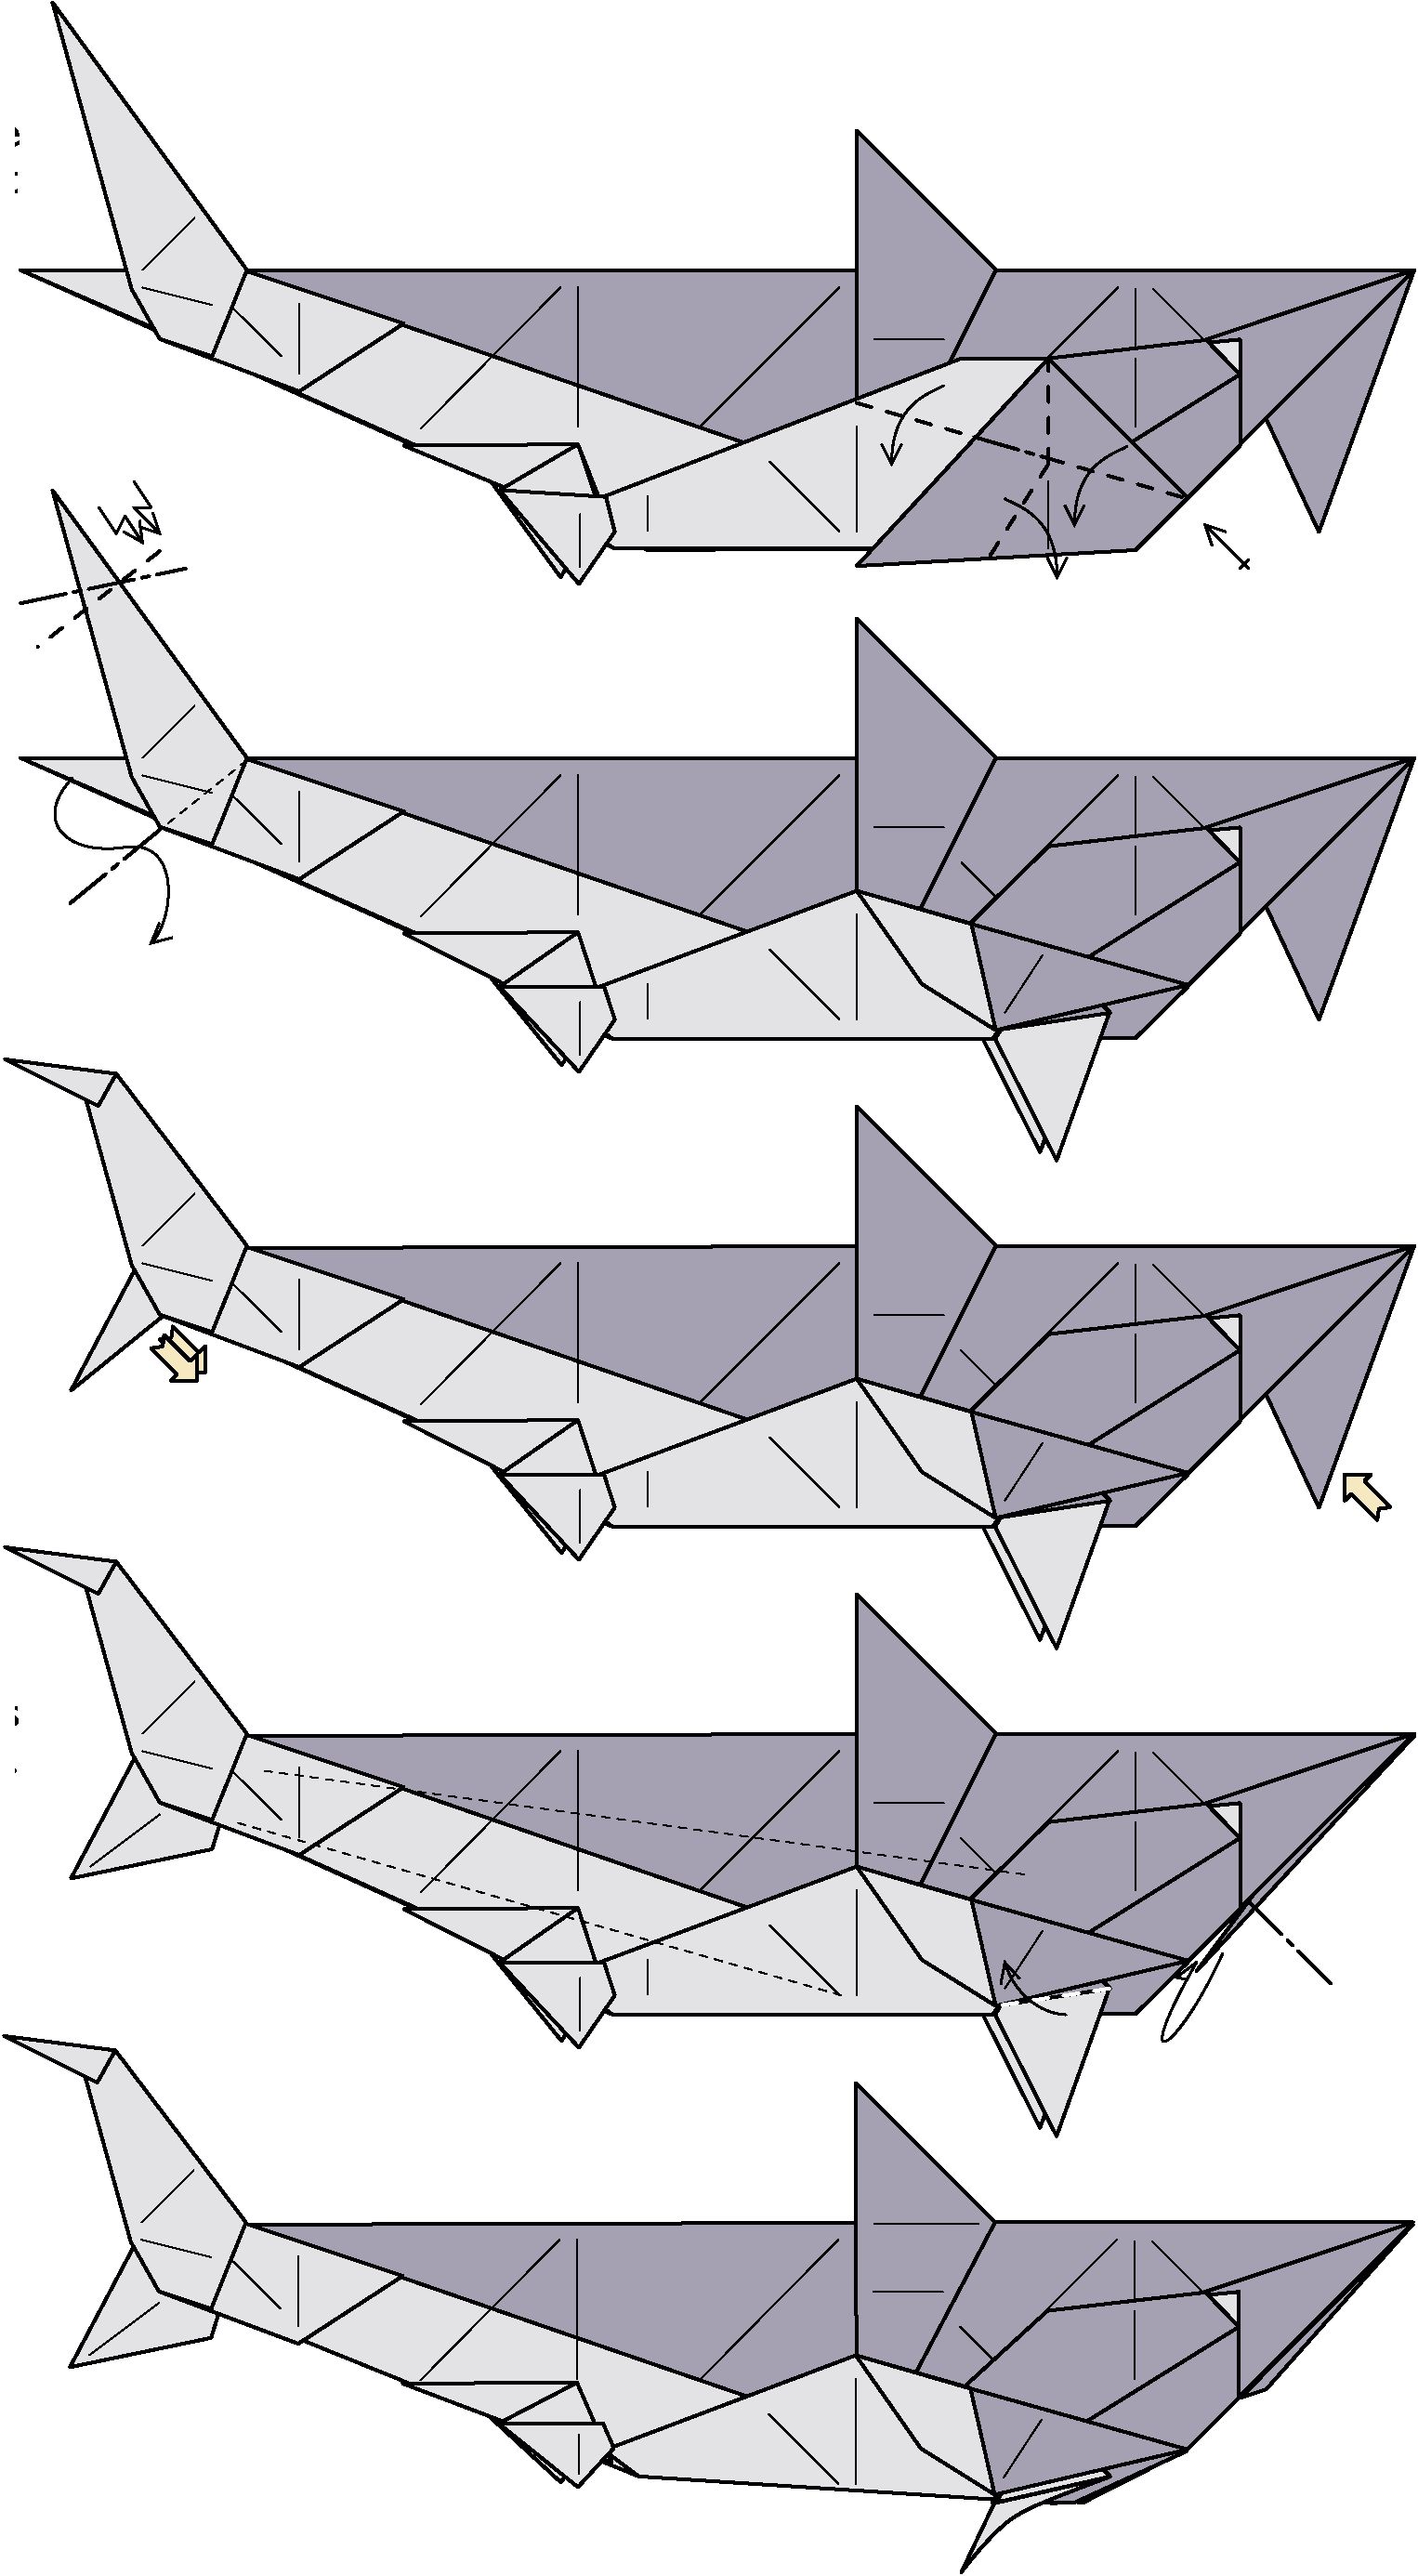
39. Precrease through both layers on one side. Repeat behind.
42. Repeat steps 40-41 behind.
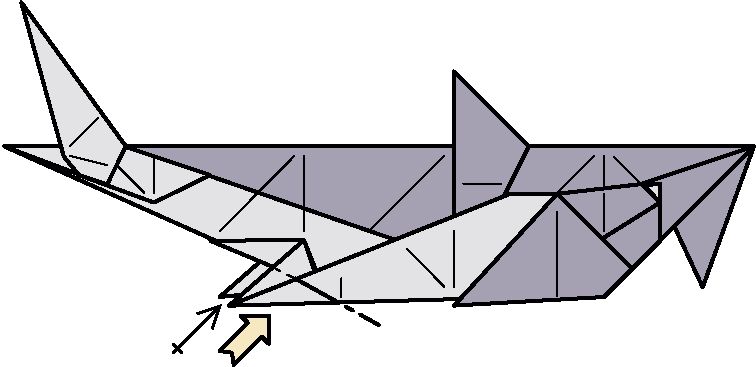
43. Bring up two layers from behind.
45. Fold the top layers back down, incorporating the outside reverse fold in the top layer.
48. Make three mountain folds to lock the loose flaps. Repeat behind.
40. Inside reverse fold. Model will not lie flat.
46. Fold the small corner under. Repeat behind.
49. Inside reverse fold the back fin. Separate the layers as evenly as possible. Repeat behind.
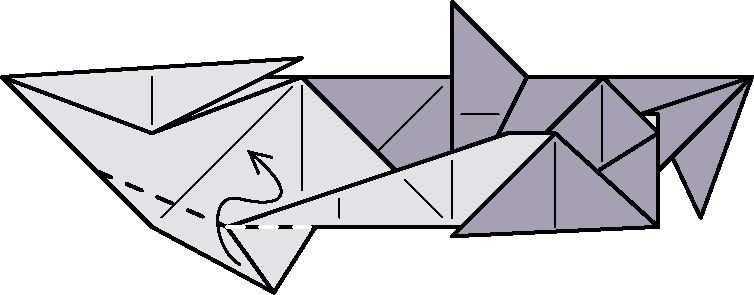
41. Inside reverse fold. Model will now lie flat.
44. Inside reverse fold the two hidden corners.
47. Fold the thick layer inside. There will be a small squash under the back fin. Repeat behind.
50. Fold the back fin down, spreading the small pocket shown. Repeat behind.
Great White Shark by Joseph Wu (Diagrams © 1999 by Joseph Wu)
Page 5
Page 6
54. Mountain fold the loose corner under the head inside. Fold the front fins out sideways from the body. Round the body.
55. The completed great white shark.
53. Pull out a layer from both sides of the tail. Flatten the front of the head (the model will become 3D).
51. Valley fold the ‘shoulder’ down, incorporating the inside reverse fold to form the front fin. Repeat behind.
52. Crimp the top of the tail, and inside reverse fold the bottom of the tail.
Download PDF file with this instructions for printing